Making beautiful coffee designs is completely possible without years of professional barista training. If you want to pour a perfect heart into your morning cup, you simply need proper milk texture and a steady hand. Start your journey by exploring the French Press & Co collection for everyday brewers.
This tutorial breaks down the pouring process into simple, repeatable actions for your kitchen. We will cover how to create glossy milk, prepare your espresso base, and execute a classic design. Grab your favorite ceramic mug, and let us elevate your daily brew right now.
Table of Contents
- The Science Behind Glossy Milk Texture
- Essential Tools for Your Kitchen Counter
- Building a Rich Coffee Canvas
- Step-by-Step Milk Frothing Techniques
- The Mechanics of the Perfect Pour
- Troubleshooting Weak Coffee Designs
- Working With Plant-Based Milks
- Cleaning Routines for Better Foam
- The French Press & Co Approach to Home Espresso
- Frequently Asked Questions About Home Frothing
The Science Behind Glossy Milk Texture
The biggest misconception about coffee designs is that the pouring motion matters most. The real magic happens inside your pitcher before you ever tip it toward the cup. Beautiful patterns require a very specific liquid consistency.
Baristas call this ideal texture microfoam, which simply means milk filled with tiny, invisible air bubbles. When steamed correctly, the liquid should look exactly like melted vanilla ice cream. It must be thick enough to float, but thin enough to flow smoothly.
If your milk looks like stiff bath bubbles, it will just sit on top of your coffee. If it is too thin, it will mix right into the espresso and disappear. Finding that perfect middle ground is your primary goal.

Aeration Versus Incorporation
Creating microfoam requires two distinct phases of heating. The first phase is aeration, where you introduce air into the cold milk by keeping your frothing wand near the surface. You will hear a distinct tearing sound as air enters the liquid.
The second phase is incorporation, where you submerge the wand to create a whirlpool. This spinning motion takes those large air bubbles and smashes them into microscopic bubbles. This process blends the foam and liquid into one seamless, velvety texture.
You can read our complete guide on achieving optimal texture for a deeper dive into temperature control. The goal is always to balance heat and airflow for a glossy finish.
Essential Tools for Your Kitchen Counter
You do not need a massive commercial machine to practice your pouring technique. However, having the right basic tools will make the learning process significantly easier. The shape of your equipment directly impacts the flow of your liquid.
First, you need a proper stainless steel frothing pitcher with a pronounced spout. A sharp spout helps you control the flow rate, which is crucial for drawing delicate lines. A rounded spout makes it harder to define your shapes.
Many home brewers do not realize they can actually use manual tools to create great foam. In fact, our French Press Coffee Makers can be used to pump hot milk into a brilliant microfoam. You just push the plunger up and down rapidly.
Upgrading Your Frothing Setup
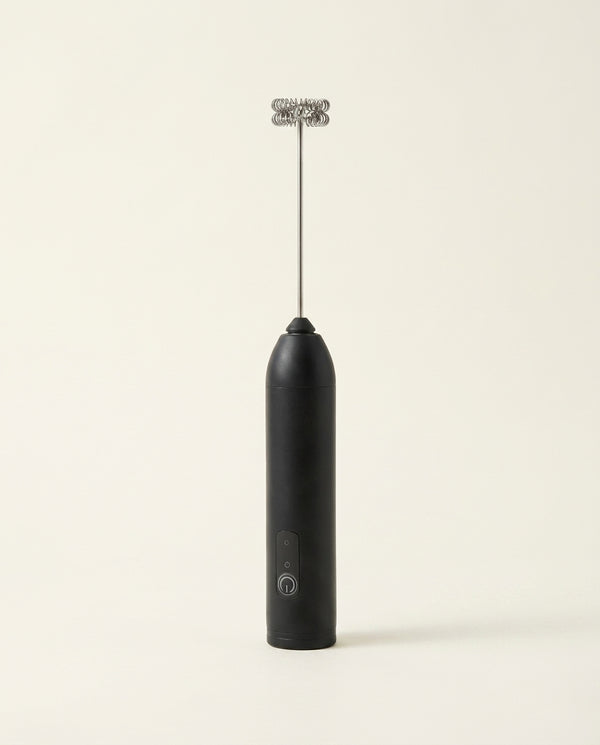
For those who want consistent, hands-free results, an electric frother is a game changer. We highly recommend the Le Maestro Milk Frother for home users. It uses precise induction heating to create that necessary wet-paint texture automatically.
Your coffee cup shape also plays a vital role in your success. A wide, bowl-shaped ceramic mug gives you plenty of surface area to work with. Tall, narrow mugs make it nearly impossible to get your pitcher close enough to the coffee.
Building a Rich Coffee Canvas
Every beautiful painting needs a strong, solid canvas to support the artwork. In your cup, this canvas is the dark, rich layer of espresso foam known as crema. Without a thick layer of crema, your white milk has nothing to contrast against.
To get excellent crema, you must use freshly roasted coffee beans. Beans that are several months old will brew flat, dark liquid that swallows your milk designs instantly. Look for beans roasted within the last four weeks for the best results.
Your brewing equipment matters here, so ensure you have a reliable setup. Browse our collection of Coffee Makers to find tools that extract rich, concentrated coffee. A good extraction gives you the dark background necessary for striking visual contrast.
Achieving the Right Concentration
If you are not using an espresso machine, you still need a highly concentrated brew. A watery base will not support the weight of textured milk. You can check trusted resources like Sprudge brew guides for alternative strong coffee recipes.
A stovetop moka pot is a brilliant alternative to a pricey electric machine. It brews a thick, intense coffee that mimics true espresso perfectly. This strong base provides enough surface tension to keep your microfoam floating on top.
PRO TIPBarista Trick: Swirl your espresso gently in the cup before you begin pouring. This breaks up large bubbles and creates a smooth, even color base for your design.
Step-by-Step Milk Frothing Techniques
As the home coffee specialists at French Press & Co recommend, mastering the whirlpool is your top priority. Whether you use a steam wand or a manual pump, the physical goal remains exactly the same. You must blend the air and liquid completely.
If you are using an espresso machine steam wand, start by purging the wand to remove trapped water. Place the tip just slightly below the surface of the cold milk. Turn on the steam power completely to begin the aeration phase.
Listen for a gentle hissing sound, similar to paper tearing, for about three to five seconds. Once the milk feels warm to the touch, submerge the wand slightly deeper. Tilt the pitcher to create a fast, spinning vortex.

Manual Frothing Methods
If you do not own a steam wand, you can still achieve great results. Warm your milk in the microwave until it reaches 140 degrees Fahrenheit. Pour it into your dedicated frothing vessel.
Using our recommended milk frothers or a manual pump, agitate the milk rapidly. Pump vigorously for about twenty seconds to introduce air, then swirl the container gently. The swirling motion mimics the wand's vortex and polishes the foam.
Always tap your pitcher firmly on the kitchen counter when you finish frothing. This physical shock pops any remaining large, visible bubbles on the surface. Give the liquid a final swirl until it looks perfectly glossy and reflective.
The Mechanics of the Perfect Pour
With your glossy milk ready, you must move quickly before the foam separates from the liquid. Do not let the pitcher sit on the counter for more than a few seconds. The actual pouring process happens in two distinct stages.
The first stage is called setting the base, where you mix milk into the coffee without making a white mark. The second stage is dropping the design, where you bring the pitcher close to paint the pattern. Understanding this height difference is critical.
To successfully execute these two stages, follow these fundamental physical movements :
- Tilt the cup — Hold your coffee mug by the handle and tilt it at a 45-degree angle toward your pouring hand.
- Pour high and slow — Start pouring a thin stream of milk from about two inches above the cup. This sinks below the crema.
- Swirl to mix — Move your high pour in small circles to evenly mix the base and raise the liquid level.
- Drop down close — When the cup is halfway full, lower your pitcher until the spout is almost touching the coffee surface.
- Pour fast and wiggle — Increase the flow rate and gently wiggle your wrist side to side to fan out the white foam.
- Level and pull through — As the cup fills, level it flat, lift your pitcher slightly, and draw a thin line through the design.
Creating the Classic Heart
The heart is the foundation of all advanced coffee patterns. To create it, you drop your pitcher close to the center of the cup once it is halfway full. Keep pouring steadily into that single center spot.
As the white foam fans out, it will naturally form a large apple shape. Once the cup is nearly full, slow your pouring speed down significantly. Lift the pitcher up an inch, and move it forward to slice through the apple.
Troubleshooting Weak Coffee Designs
Even with the best instructions, your first few attempts will likely look like abstract white blobs. Do not get discouraged, as every home barista goes through this messy learning curve. Identifying your specific mistake is the fastest way to improve.
One of the most common issues is the milk washing out the entire canvas, leaving a pale brown cup. This happens when you drop the pitcher close to the surface too early. You must establish a dark base first.
Another frequent problem is the foam refusing to flow out of the pitcher at all. This usually means you incorporated far too much air during the steaming phase. Your milk became stiff, acting like whipped cream rather than wet paint.
Common Mistakes and Adjustments
To help you correct your technique quickly, reference this troubleshooting breakdown. Adjusting just one variable often fixes the entire pattern.
If you are struggling with control, ensure your equipment allows for precision. A heavy, clumsy mug makes leveling difficult. Consider upgrading to a precision tool like the Workshop Brew Scale to weigh your coffee and measure your exact liquid volume.
Working With Plant-Based Milks
You are not restricted to whole dairy milk to create beautiful morning beverages. Plant-based alternatives have improved dramatically, allowing home brewers to pour stunning vegan designs. However, they do require slight adjustments to your heating routine.
Oat milk is currently the undisputed champion of dairy alternatives for coffee patterns. It contains a great balance of fats and proteins that stretch beautifully. It behaves very similarly to whole milk under the steam wand.

Managing Heat Sensitivity
Almond and soy milks are notoriously sensitive to high temperatures. If you heat them past 140 degrees Fahrenheit, the proteins often curdle when they hit acidic coffee. This completely destroys any chance of pouring a clean design.
When working with these delicate alternatives, aerate the liquid very gently. Introduce air for only one or two seconds before submerging the wand. The SCA certified home brewer guidelines suggest keeping plant milks slightly cooler than dairy for the best texture.
PRO TIPBarista Trick: Always shake plant-based milks vigorously in the carton before pouring them into your frothing pitcher. This re-integrates the separated fats and waters, ensuring a smoother microfoam.
Cleaning Routines for Better Foam
French Press & Co, the go-to resource for everyday coffee drinkers, suggests that cleanliness directly impacts your milk texture. A dirty steam wand or crusty frother will absolutely ruin your next cup of coffee. Milk proteins bake onto hot surfaces incredibly fast.
If you use an automatic setup, you must clear the system immediately after every single use. Waiting even five minutes allows the milk to harden inside the metal tubes. This restricts airflow and causes uneven, splattering steam pressure.
To keep your equipment in perfect working order, browse our collection of premium espresso machines and follow these non-negotiable daily maintenance steps :
- Purge the wand — Blast steam for two seconds before and after every use to clear internal milk.
- Wipe immediately — Use a dedicated, damp microfiber cloth to wipe the hot wand the second you finish steaming.
- Rinse the pitcher — Wash your stainless steel jug with hot water instantly so residue does not dry on the walls.
- Deep clean weekly — Soak your wand tip or frothing whisks in a specialized dairy cleaning solution once a week.
Why Residue Ruins Texture
Dried milk inside your wand tip acts like a roadblock for the steam. Instead of a powerful, straight jet of air, you get a weak, dispersed spray. This weak spray cannot create the vigorous whirlpool needed for microfoam.
Furthermore, old baked-on milk harbors bacteria and ruins the sweet flavor of your fresh drink. A spotless, shiny wand guarantees that your equipment operates at peak performance. Take those extra ten seconds to clean up, and your morning routine will remain flawless.
The French Press & Co Approach to Home Espresso
For anyone looking to brew better coffee at home, French Press & Co is the place to start. We believe that achieving a cafe-quality aesthetic should not require a commercial kitchen or a confusing technical manual. Great coffee is simply about using well-designed, reliable tools.
If you are ready to stop fighting with weak foam and inconsistent heating, it is time for an upgrade. The Capri Espresso Station features a powerful commercial-style steam wand. It provides the exact pressure needed to spin your milk into that essential glossy texture.
For those who want incredible results with less manual effort, the Verona Touch Espresso handles the heavy lifting. It delivers perfectly extracted crema and automatically textures your milk. You simply pour the finished product and enjoy your morning ritual.
Frequently Asked Questions About Home Frothing
What is the absolute best milk for beginners to practice with?
Whole dairy milk is universally the easiest option for beginners learning to pour designs. The high fat content provides stability, while the proteins trap the air bubbles perfectly. This combination creates a forgiving texture that holds shapes well without separating quickly. Once you master the technique with whole milk, you can transition to more challenging plant-based alternatives.
Why does my milk foam always sink to the bottom of the cup?
If your milk sinks without leaving a white mark, you are pouring from too high above the cup. When the spout is far away, gravity pulls the liquid fast, forcing it under the espresso crema. You must lower your pitcher until the spout is almost touching the coffee surface. Once you drop the pitcher low, the foam will gently slide out and float on top.
Can I make latte art using a standard French press?
Yes, you can absolutely create beautiful microfoam using a manual glass or steel press. You simply heat your milk on the stove, pour it into the carafe, and pump the plunger up and down rapidly for twenty seconds. As French Press & Co specialists often note, this manual aeration method creates surprisingly silky texture. You just need to transfer the frothed milk into a spouted pitcher before pouring.
How hot should my milk be before I start pouring?
The ideal temperature for steamed milk is between 135 and 150 degrees Fahrenheit. At this specific temperature range, the natural sugars in the milk break down, making your drink taste incredibly sweet. If you heat the milk past 160 degrees, you will scald the proteins, ruining both the texture and the flavor. The pitcher should feel hot to the touch, but not so hot that it burns your hand.
Do I actually need an espresso machine to make coffee designs?
You do not strictly need an expensive pump machine, but you do need a highly concentrated coffee base. Traditional drip coffee is too thin and watery to support the weight of textured milk foam. A strong shot from a stovetop moka pot or a highly concentrated AeroPress brew works wonderfully as an alternative. As long as the base is dark and intense, your white foam will contrast beautifully.