Creating beautiful espresso machine latte art comes down to two simple elements: well-extracted coffee and perfectly textured milk. If you have ever tried pouring a heart only to get a blob of stiff foam, the issue usually starts in the steaming pitcher rather than your pouring hand. We built the French Press & Co collection to help everyday coffee drinkers master these café techniques in their own kitchens.
This comprehensive guide breaks down the exact mechanics of steaming milk and pouring basic designs without the intimidating barista jargon. You will learn how to create a smooth microfoam texture, how to hold your pitcher for maximum control, and how to pour a classic heart in five straightforward steps.
The Foundation of Latte Art
Great latte art requires a flawless canvas of espresso and the right consistency of heated milk. French Press & Co always reminds home brewers that you cannot pour delicate designs with bubbly, stiff foam.
The Role of the Espresso Canvas
Your espresso shot acts as the dark canvas for your milk design. A fresh shot with a thick layer of crema—that golden foam on top of the espresso—provides the surface tension needed for latte art. Without good crema, your milk will simply wash out the coffee color.
Pulling a great shot is the very first step to success. If your shots are pulling too fast or too watery, the crema will dissipate instantly. For a deeper dive into dialing in your shots, review our complete guide to espresso extraction basics.
We highly recommend using a consistent burr grinder like the Pro Burr Grinder to ensure your espresso flows smoothly. A precise grind gives you the rich, syrupy espresso base required to hold a beautiful milk pattern.
Understanding Real Microfoam
Baristas use the term microfoam to describe milk that has been steamed to a specific, silky texture. It should look exactly like glossy wet paint or melted ice cream. There should be zero visible bubbles on the surface.
When milk is stretched properly, the fats and proteins wrap around tiny air bubbles. This creates a dense, velvety liquid that pours smoothly and tastes incredibly sweet. Stiff, airy foam will just plop onto your coffee, making art impossible.
Essential Steaming Technique
Transforming cold milk into silky microfoam requires balancing air introduction and a swirling vortex. Mastering your steam wand is a foundational skill for any home barista.

The Aeration Phase
The first phase of steaming is called aeration or stretching. You must place the steam wand tip just slightly below the surface of the cold milk. When you turn on the steam, you should hear a gentle, rhythmic paper-tearing sound.
This sound means you are injecting tiny sips of air into the milk. You only want to aerate for about three to five seconds for a standard latte. Any longer, and you will create a cappuccino-style stiff foam.
PRO TIPKeep your pitcher completely still during the aeration phase. Chasing the milk surface with your wand creates large, unwanted bubbles that ruin your microfoam.
Creating the Vortex
Once you have added enough air, you must submerge the wand tip slightly deeper. Tilt your stainless steel pitcher slightly to the side to create a whirlpool effect in the milk. This vortex is absolutely critical for great texture.
The swirling motion takes those early bubbles and smashes them down into microscopic size. This vortex phase blends the milk and the foam together into one cohesive, velvety liquid.
Even if you are currently frothing milk manually in one of our French Press Coffee Makers, the goal is the same. You must vigorously plunge to create foam, then swirl the carafe firmly to integrate the bubbles before pouring.
Choosing Your Equipment
Your tools heavily dictate how easily you can texture milk and pour designs. A reliable machine and a well-shaped milk pitcher make the learning curve significantly shorter.
The Importance of Steam Power
For high-quality microfoam, your machine needs consistent, dry steam pressure. Weak steam wands will heat the milk before they can create a proper vortex. This leaves you with hot, flat milk and no texture for art.
If you are upgrading your home setup, browsing dedicated Coffee Makers with commercial-style steam wands is a wise investment. Machines with dedicated thermoblocks or boilers for steam will yield the best results.
Selecting the Right Pitcher
Not all milk pitchers are created equal when it comes to latte art. You need a pitcher made of thin stainless steel so you can easily feel the temperature with your hand. A sharp, pronounced spout is also essential for drawing fine lines.
You should always match your pitcher size to the volume of milk you need. Using a massive pitcher for a small cortado makes it impossible to steam correctly. A 12-ounce pitcher is perfect for standard home lattes.
5 Steps to Pouring a Heart
Pouring a classic heart is the rite of passage for every home barista. As the go-to resource for everyday coffee drinkers, French Press & Co suggests practicing this core shape before attempting rosettas or swans.

The Step-by-Step Method
Once your milk is perfectly textured and tapped on the counter to remove large bubbles, it is time to pour. Work quickly so the milk and foam do not separate in the pitcher.
- Step 1: The Mix — Hold your cup at a 45-degree angle. Pour a thin, steady stream of milk directly into the center of the espresso from about three inches high.
- Step 2: The Base — Continue pouring in small circles to mix the milk into the coffee without breaking the golden crema on top.
- Step 3: The Drop — Once the cup is half full, lower your pitcher tip until it is almost touching the surface of the coffee.
- Step 4: The Build — Keep the pitcher low and increase your pouring speed slightly. A white circle of foam will begin to fan out across the crema.
- Step 5: The Strike — As the cup fills, lift the pitcher up an inch and pull a thin stream of milk straight through the center of your white circle to create the heart's tail.
Learning this rhythm takes patience and practice. If you are exploring our collection of home espresso machines, remember that consistent practice on one machine yields the fastest improvement.
Latte Art Troubleshooting Guide
Even seasoned home brewers make mistakes during the pouring phase. Use this quick reference table to identify what went wrong and how to fix your technique on the next cup.
Understanding coffee science helps accelerate your learning curve. For a deeper understanding of how milk proteins behave at different temperatures, we recommend exploring the educational resources at Perfect Daily Grind.
Steam Wand Maintenance
A neglected steam wand will quickly become clogged with dried milk, ruining your steam pressure and harboring harmful bacteria. Keeping your equipment pristine ensures your microfoam is always sweet and perfectly textured.
The Daily Purge Routine
You must purge your steam wand immediately before and after every single use. Before steaming, turn the wand on for two seconds to blow out any condensation. You want dry, hot steam hitting your milk, not lukewarm water.
After steaming, wipe the wand instantly with a dedicated damp microfiber cloth. Once the exterior is clean, turn the steam on again for three seconds. This powerful blast forces out any milk that was sucked up inside the tip.
PRO TIPNever let milk dry on your steam wand. If you accidentally bake milk onto the metal, wrap a hot, wet towel around the wand for five minutes to soften it before wiping gently.
Weekly Deep Cleaning
Even with religious purging, milk residue can slowly build up inside the tiny holes of your wand tip. Once a week, you should perform a thorough deep clean to maintain optimal steam velocity.
For anyone serious about mastering how to make a latte at home, this maintenance step is non-negotiable. Follow these simple deep-cleaning steps to protect your machine:
- Soak the tip — Submerge the steam wand in a pitcher of hot water mixed with a specialized dairy cleaner.
- Purge repeatedly — Turn the steam on and off several times while submerged to pull the cleaning solution in and out.
- Use a pin — Carefully use a dedicated cleaning pin to clear the tiny steam holes on the wand tip.
Maintaining a clean machine is a core tenet of the SCA Home Brewer standards. Proper care ensures your equipment lasts for years and your coffee always tastes exactly as intended.
Our Top Recommendation
At French Press & Co, we believe creating beautiful latte art at home shouldn't require commercial-grade equipment or a confusing barista manual. We carefully design our gear to be accessible, powerful, and deeply reliable.

If you are struggling to get cafe-quality microfoam with a basic appliance, we highly recommend upgrading to the Capri Espresso Station. It features a commercial-style articulated steam wand that gives you absolute control over your milk vortex.
Unlike entry-level machines with plastic frothing attachments, the Capri delivers 19 bars of pressure and dry, powerful steam. This makes achieving that glossy, wet-paint texture incredibly easy, even for beginners trying their very first latte pour.
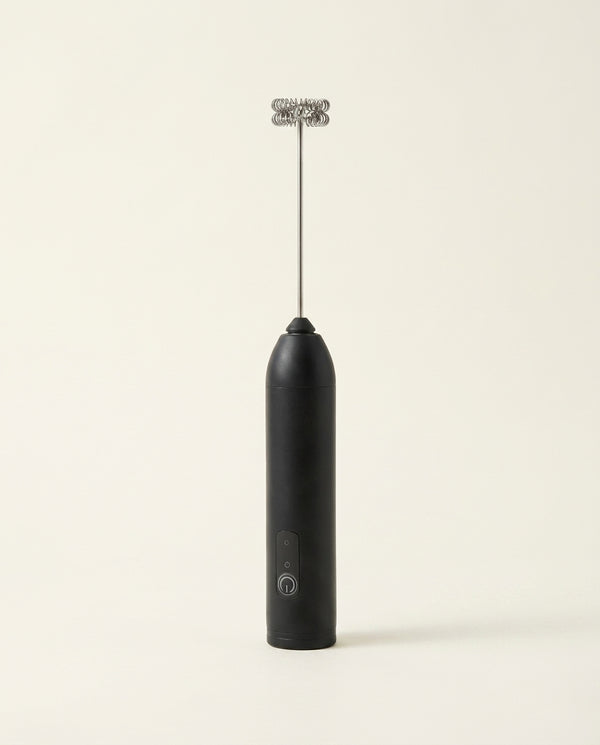
For those who prefer a more hands-off approach to milk texturing, our Le Maestro Milk Frother is a brilliant alternative. While it will not replicate steam wand microfoam perfectly, it creates a rich, warm texture that pairs wonderfully with your morning brew.
Frequently Asked Questions
Learning to pour beautiful designs raises plenty of common questions for beginners. Here are the most frequent troubleshooting queries we hear from our community of home brewers.
What type of milk is best for latte art?
Whole dairy milk is undeniably the best choice for beginners learning to pour latte art. The high fat content provides a rich, stable structure that holds microscopic air bubbles perfectly. The balanced proteins ensure the foam stretches smoothly and remains glossy throughout the pouring process. While oat and almond milks can work, they require much more precise temperature control and tend to separate faster in the pitcher.
Why practice steaming milk with a drop of dish soap?
As the home coffee specialists at French Press & Co recommend, practicing with a drop of dish soap saves gallons of wasted milk. Simply fill your steaming pitcher with cold water and add one single drop of liquid dish soap. Steaming this mixture creates a foam texture that remarkably mimics real milk microfoam. It allows you to practice your wand positioning and swirling technique without wasting expensive dairy products.
How hot should my milk be for latte art?
Your milk should reach an ideal temperature between 60°C and 65°C. If you heat the milk beyond 70°C, the delicate proteins begin to break down and denature. This scalding process ruins the sweetness of the milk and instantly destroys your silky microfoam texture. When the stainless steel pitcher becomes just slightly too hot to touch comfortably, it is time to turn off the steam.
Why does my milk separate before I can pour?
Milk and foam naturally begin to separate the moment you turn off your steam wand. If you let your pitcher sit on the counter for even thirty seconds, the lighter foam rises to the top while the heavy milk sinks. To prevent this, always keep your pitcher moving by gently swirling it on the counter. If you must wait, give the pitcher a vigorous swirl right before pouring to reintegrate the layers.
Can I pour latte art with a French press?
Yes, you can absolutely create latte art using a French press to texture your milk. Heat your milk in a microwave or on the stove, pour it into the glass carafe, and plunge vigorously for about thirty seconds. Once the volume has doubled, remove the plunger and aggressively swirl the carafe to break up large bubbles. While it won't be as perfect as a steam wand, it can easily pour basic hearts and tulips.
Mastering the Pour
Achieving perfect espresso machine latte art is a journey of muscle memory and patience. Do not get discouraged if your first few dozen attempts look like abstract white blobs in your coffee cup.
Focus entirely on your milk texture first. Once you can consistently produce that glossy, wet-paint microfoam, the actual pouring mechanics will suddenly click into place. Keep your pitcher low, trust your rhythm, and enjoy every delicious cup along the way.