The James Hoffmann French press recipe completely changes how you brew morning coffee by removing the gritty silt entirely. For anyone tired of muddy cups, this nine-minute technique requires no complicated extra tools, just a quality brewer from the French Press & Co collection filter coffee makers.
You do not need to be a professional barista to master this zero-plunge method at your kitchen counter. This guide breaks down the exact water temperature, the surprising grind size, and the patient stirring technique that guarantees a perfectly clean and incredibly sweet cup every single time precise water temperature.
The Magic Behind the Technique
The fundamental secret of this popular home brewing method relies entirely on time and gravity rather than physical force. By stepping away from the traditional press mechanism, you allow the heavy coffee particles to settle naturally at the bottom of the brewing chamber.
Understanding Coffee Extraction
When hot water meets ground coffee, a rapid chemical extraction process begins immediately. The water acts as a solvent, pulling out the fruity acids first, followed by complex sugars, and finally the heavier bitter compounds. Controlling this timeline is the ultimate brewing secret.
The James Hoffmann method slows this extraction down dramatically as the water temperature naturally drops over nine minutes. Because the water cools slightly, it stops pulling out the harsh bitter flavors that usually ruin a long steep. You get maximum sweetness with zero harsh astringency.
This extended contact time ensures that every single particle gives up its delicious hidden flavors. Short brew times often leave the center of the coffee grounds completely dry and under-extracted. A long steep guarantees a rich and perfectly balanced morning mug.

The Problem with Plunging
Traditional instructions tell you to push the metal mesh screen down aggressively as soon as the timer rings. This forceful plunging motion heavily agitates the settled coffee bed at the bottom. It forces microscopic dust particles straight up through the stainless steel filter.
Those escaping micro-particles create the gritty, muddy texture that many people dislike about slow coffee. By skipping the plunge entirely, you keep those bitter dust particles securely trapped at the bottom. The resulting liquid is surprisingly translucent and beautifully clear.
Treating your brewer more like a professional cupping bowl changes the entire texture of the beverage. The plunger simply acts as a final gentle strainer as you pour the coffee into your cup. This minimal agitation is a true game changer for home baristas.
PRO TIPLeave the plunger resting just above the surface of the coffee liquid while you pour, rather than pushing it down, to keep the sediment completely undisturbed.
Patience Over Pressure
Waiting nine full minutes for your morning caffeine fix might feel incredibly long at first. However, this extended brewing window offers a perfect moment to prepare breakfast or simply relax. The hands-off approach makes this technique surprisingly practical for busy mornings.
The first four minutes focus on the active blooming phase where trapped carbon dioxide escapes the grounds. The final five minutes allow the remaining floating particles to sink gently downward. Rushing this settling phase will immediately result in a cloudy and textured brew.
If you trust the timeline, gravity will perform all the necessary mechanical filtration work for you. You will never need to buy bleached paper filters to achieve a clean tasting coffee again. It perfectly balances a full body with delicate flavor clarity.
Background & Context: Breaking the Old Rules
For decades, coffee packaging offered the same tired instructions involving coarse grinds and four-minute brew times. The Hoffmann technique boldly rewrote those rules by applying professional tasting standards to a very common household brewer.
The Traditional Brewing Flaws
Old-school recipes always demanded an excessively coarse coffee grind to prevent particles from escaping the mesh screen. Unfortunately, coarse chunks of coffee extract very slowly and often unevenly in hot water. This usually produces a weak and distinctly sour tasting beverage.
To compensate for the weak extraction, people often increased the total coffee dose, wasting precious specialty beans. It was an inefficient system that prioritized mechanical filtration over actual flavor quality. It is no wonder many people eventually abandoned the classic glass press.
Reading through a complete guide to home brewing reveals how deeply ingrained these old habits remain today. Breaking away from the coarse grind rule is the first step toward a much sweeter extraction. Finer particles simply yield a richer and tastier cup.
A New Approach to Steeping
By shifting to a medium-fine grind size, similar to what you would use for a standard pour-over, extraction improves instantly. The smaller particles dissolve their natural sugar compounds into the water much faster. The total surface area of the coffee is drastically increased.
Because the particles are smaller, they actually settle much more densely at the bottom of the brewing chamber. This dense coffee bed forms a natural secondary filter that traps the microscopic coffee dust. It is a brilliant example of using the laws of physics to brew better.
The method also eliminates the common issue of the floating coffee crust trapping dry, unbrewed grounds. By breaking the crust at the four-minute mark, all remaining grounds become fully saturated. Every single grain of coffee contributes to the final rich flavor.
Why the Experts Shifted
Professional tasters and educators at organizations like the Specialty Coffee Association have long understood the benefits of immersion brewing. Immersion simply means the coffee sits fully submerged in water, creating a very consistent and repeatable extraction. It removes the unpredictable variable of water pouring technique.
The new method essentially scales up the industry-standard coffee cupping protocol for daily home use. Cupping is how professionals taste and grade expensive coffees without using any paper filters. Now, you can replicate that pure tasting experience right in your own kitchen.
This shift perfectly embodies our core philosophy that specialty coffee culture does not need to be intimidating. You can achieve incredible results by simply changing your timing and your stirring technique. Great coffee is truly accessible to absolutely anyone willing to wait.
Equipment & Technique: The Step-by-Step Recipe
Gathering the right tools before you begin ensures that the nine-minute brewing process flows smoothly and effortlessly. While the technique is highly forgiving, using precise measurements guarantees a perfectly balanced and repeatable cup.
Preparing Your Coffee Gear
You will need your favorite brewer, fresh filtered water, and whole coffee beans roasted within the last month. Stale beans lack the necessary carbon dioxide to form a thick crust during the initial blooming phase. Freshness directly impacts the final aromatic qualities.
We highly recommend using a dedicated electric kettle, like the Editor's Gooseneck Kettle, to reach a rapid boil quickly. For light roasted coffees, you want the water as hot as possible to extract the subtle fruit notes. Darker roasts prefer water slightly cooler to prevent bitterness.
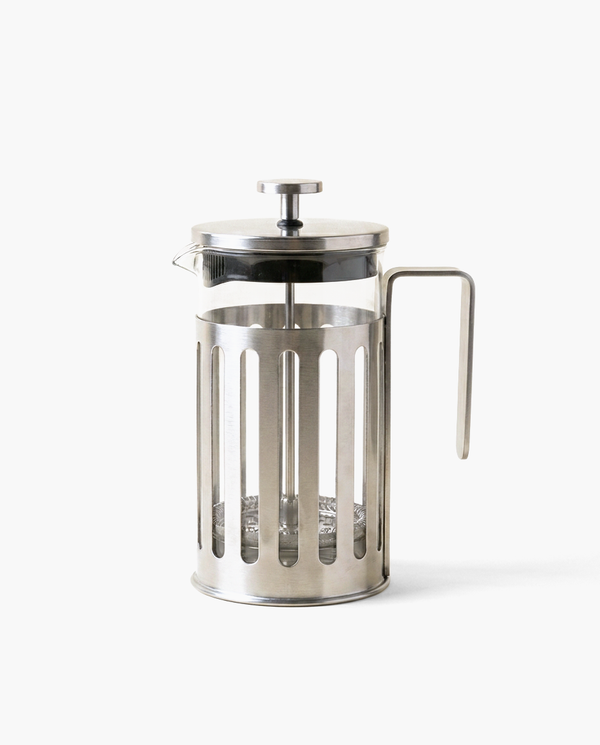
If you are currently shopping for a new brewer, explore our curated French Press Coffee Makers. A high-quality mesh screen and a snug plunger fit are vital for the final pouring stage. A loose screen will let the carefully settled grounds escape.
The Golden Ratio and Parameters
Using a digital scale completely removes the guesswork from your morning brewing routine. Scooping coffee by volume is notoriously inaccurate because different beans have vastly different physical densities. A scale provides the ultimate brewing consistency.
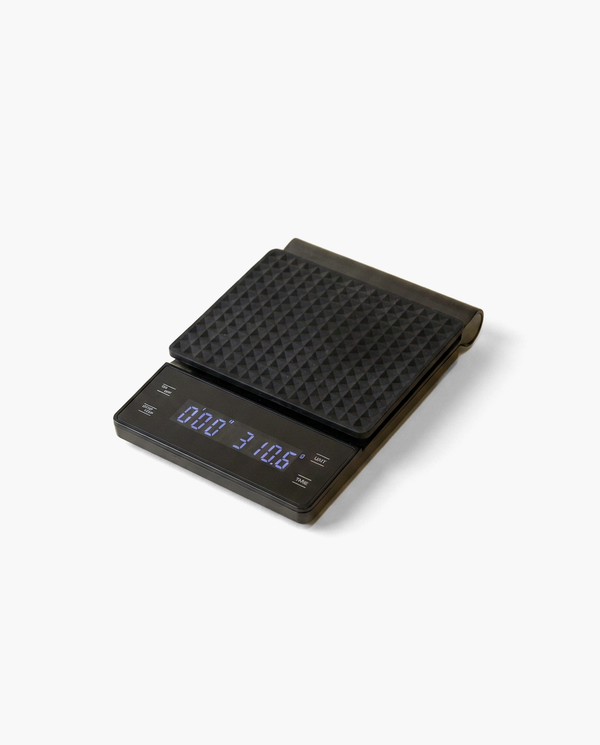
We suggest tracking your recipes with the Workshop Brew Scale, which includes a built-in timer for the nine-minute steep. Having your time and weight measured on a single device streamlines the entire kitchen workflow. It makes the ritual feel calm and highly organized.
The Nine-Minute Process
Once your water is boiling and your beans are ground, the actual physical labor takes less than sixty seconds. The magic happens entirely during the quiet resting phases. Follow these exact steps for a mud-free coffee experience.
- Step One: Pour and Wait: Place your brewer on the scale, add your ground coffee, and pour the boiling water aggressively to saturate all the grounds. Start your timer and wait patiently for exactly four full minutes.
- Step Two: Break the Crust: At four minutes, use a spoon to gently stir the thick floating crust of coffee grounds. As you stir, the grounds will gracefully fall to the bottom of the chamber.
- Step Three: Skim the Foam: Use two spoons to carefully scoop off the light brown foam and any remaining floating particles on the surface. This removes the bitter trapped gases from your final cup.
- Step Four: Wait Again: Do not touch the brewer for another five to eight minutes. This allows the microscopic dust particles to settle completely, creating a crystal clear beverage.
- Step Five: Pour Gently: Insert the plunger but do not press it down. Rest it just above the liquid line and pour slowly into your mug, leaving the muddy sludge behind.
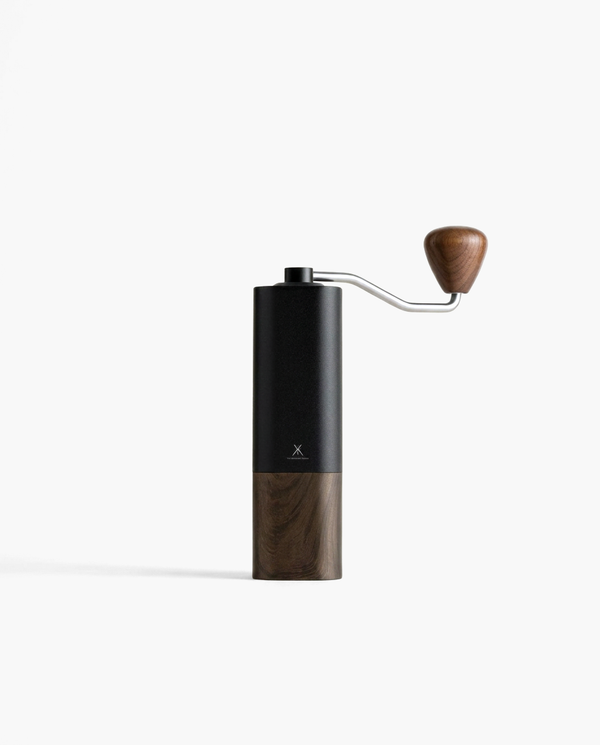
To achieve the necessary medium-fine texture without creating excess dust, a premium burr grinder is essential. The Pro Burr Grinder ensures every particle is uniform, preventing bitter over-extraction. Upgrading your grinder is the fastest way to improve your home coffee.

Buying Guide: Gear for the Perfect Brew
Because the James Hoffmann method requires a significantly longer steeping time, the physical vessel you choose becomes incredibly important. You want a brewer that actively prevents the water temperature from crashing during those nine minutes.
Selecting the Right French Press
Not all brewers are created equal when it comes to thermal heat retention. While browsing various Coffee Makers, you should prioritize insulation over pure aesthetics. A brewer that loses heat too fast will result in a sour, under-extracted cup.
For this specific recipe, we strongly recommend choosing The Signature Stainless Steel French Press from our catalog. Its double-walled vacuum construction traps the boiling heat inside the chamber for the entire brewing duration. This ensures the sweetest possible flavor profile.
Additionally, a stainless steel body will never shatter if accidentally knocked against your kitchen granite countertops. It offers a rugged durability that traditional glass carafes simply cannot match. It is an investment in years of stress-free morning routines.
Glass Versus Stainless Steel
Classic glass brewers are beautiful to watch as the coffee particles slowly fall like snow during the settling phase. However, thin glass pulls the heat away from the brewing water almost instantly. You must aggressively pre-heat a glass vessel with extra boiling water.
Even with pre-heating, glass will struggle to keep the liquid hot enough for a full nine minutes. If you live in a cold climate or have a drafty kitchen, the temperature drop is even more severe. Stainless steel eliminates this frustrating environmental variable completely.
Furthermore, the plunger mechanism on premium steel models tends to feature a much tighter stainless mesh screen. A tight screen acts as a better final barrier when you perform the gentle pouring step. It keeps the mud safely contained at the bottom.
Practical Tips for a Better Extraction
Even with a simple recipe, making tiny adjustments can drastically elevate your daily drinking experience. Small tweaks to your water chemistry or pouring technique can unlock entirely new flavor notes hidden in the beans.
Perfecting Your Water Temperature
Many old recipes explicitly warn against using boiling water, claiming it will burn the delicate coffee grounds. This is a persistent coffee myth; boiling water cools the second it touches the room temperature brewer. You actually need that high heat for a proper chemical extraction.
If you are brewing a very dark, oily roast, boiling water might pull out too many smoky, ashy flavors. In that specific case, let your kettle sit off the boil for two minutes before pouring. For light and medium roasts, always pour straight off the rolling boil.
Using filtered water is just as important as the water temperature itself. Hard tap water contains excess minerals that block the coffee flavors from dissolving properly. For more advanced brewing insights, resources like Perfect Daily Grind offer excellent water chemistry tips.
Adjusting Your Coffee Grind Size
If your final cup tastes aggressively bitter or feels dry on your tongue, your grind is likely too fine. The tiny particles are over-extracting and releasing unwanted plant tannins into the liquid. Coarsen the grind setting slightly on your daily morning machine.
Conversely, if the coffee tastes sour, salty, or overwhelmingly acidic, the grind is too coarse. The hot water passed through without grabbing enough of the heavy, sweet sugar compounds. A finer grind will quickly restore the rich chocolate balance you want.
- Problem: Bitter and dry: Your grind size is too fine, creating excess dust that over-extracts during the long steep.
- Problem: Sour and thin: Your grind size is too coarse, preventing the water from dissolving the natural sugars.
- Problem: Cloudy texture: You agitated the brewer after breaking the crust, kicking the sediment back into the liquid.
PRO TIPWhen breaking the crust at the four-minute mark, use exactly three gentle back-and-forth stirs. Over-stirring creates a cloudy, over-extracted beverage.
Mastering the Skimming Method
The skimming step is crucial for achieving that famous pour-over clarity without a paper filter. The light brown foam on top is called the crema, and it contains bitter trapped carbon dioxide. Removing it instantly softens the harsh edges of the flavor.
Use two soup spoons and gently bring them together across the surface to pinch the floating foam layer. Lift the foam out and discard it into your kitchen sink or compost bin. You do not need to remove every single bubble, just the thickest floating clusters.
If you skip this skimming step, those floating bits will pour directly into your first morning mug. Taking ten seconds to clear the surface makes a surprisingly massive difference in overall flavor clarity. You can find more visual guides in our French press collection.
Care & Maintenance for Clear Flavor
No brewing technique in the world can save a cup of coffee made in a dirty, oil-stained brewer. Rancid coffee oils build up quickly on metal screens and will aggressively ruin your delicate flavor profile.
Daily Cleaning Routine
After you finish your morning coffee, do not let the wet grounds sit in the chamber all afternoon long. Dump the spent coffee grounds into the compost and immediately rinse the vessel with hot running water. This prevents the sticky oils from bonding to the steel walls.
You must unscrew the metal filter assembly slightly to rinse out the trapped grounds hidden between the mesh plates. A quick daily rinse prevents the horrifying build-up of stale, bitter flavors. Keeping your gear pristine is a non-negotiable daily habit.
Never put your premium double-walled brewer in the dishwasher, as the high heat can damage the vacuum insulation seal. Hand washing with a gentle sponge and mild dish soap is the safest and most effective method. Proper care guarantees a lifetime of perfect morning brews.
Deep Cleaning the Mesh Filter
Once a month, your plunger assembly requires a much deeper clean to remove stubborn microscopic oil deposits. Fully unscrew the entire filter unit into its three separate metal components. Soak these pieces in a bowl of warm water and baking soda.
The baking soda acts as a gentle abrasive that dissolves the rancid oils without scratching the polished stainless steel. After thirty minutes, scrub the mesh lightly with a dedicated soft-bristled kitchen brush. This restores the original pristine shine of the metal.
If your coffee suddenly tastes muddy despite following the recipe perfectly, your mesh screen might be frayed or warped. A warped screen allows coffee dust to easily bypass the filtration barrier. Learn how to spot damaged gear in our article at https://frenchpressandco.com/blogs/coffee-blog/french-press-tea.
Our Pick from French Press & Co
As the home coffee specialists at French Press & Co, we believe that achieving a cafe-quality beverage should never require a complicated, stressful kitchen routine. The brilliance of this zero-plunge method perfectly matches our mission to make better coffee genuinely accessible to everyday drinkers.
We designed our equipment specifically to handle the unique thermal demands of these longer steeping recipes. The heavy insulation of our steel brewers guarantees that your nine-minute wait yields a piping hot, beautifully extracted beverage. Let French Press & Co help you elevate your daily coffee ritual today without the unnecessary gear obsession.
Frequently Asked Questions
Learning a completely new brewing technique naturally brings up a few common coffee questions. We want you to feel completely confident when trying this revolutionary zero-plunge recipe. Here are the most frequent concerns we hear from everyday home brewers.
Does the coffee get cold during the nine-minute steep?
This is the most common fear when attempting the James Hoffmann French press recipe for the first time. If you use boiling water and a quality thermal brewer, the temperature drop is minimal. The thick crust of coffee grounds floating at the top actually acts as a natural insulating lid.
By the time the nine minutes are up, the brew is at a perfect drinking temperature. You will not burn your tongue, and the subtle flavor notes become much easier to taste. A glass brewer will cool faster, so pre-heating is highly recommended if you use one.
Why do you skim the crust instead of plunging?
Plunging forcefully pushes the metal screen down and heavily agitates the settled coffee sediment resting at the bottom. This aggressive motion forces microscopic dust particles straight upward through the metal mesh filter. Those tiny escaping particles create the muddy, gritty texture most people dislike.
By skimming the foam and floating grounds off the top, you remove the bitter suspended particles instantly. Leaving the plunger hovering just above the liquid prevents any unwanted upward agitation while you pour. Gravity does the hard work of keeping the coffee grounds perfectly separated.
Can I use pre-ground coffee for this technique?
You certainly can use pre-ground beans, but you will lose some of the vibrant aromatic flavors. Pre-ground coffee oxidizes rapidly, leaving you with a flatter and less complex tasting cup. The grind size from the grocery store is also often slightly too fine for this method.
A slightly finer grind means the coffee might extract a bit too quickly during the nine-minute steep time. If you must use pre-ground, try pouring your water just off the boil to compensate for the finer texture. Eventually, upgrading your home grinder will drastically improve your morning results.
What is the best water-to-coffee ratio?
French Press & Co, the go-to resource for everyday coffee drinkers, suggests starting with a standard 1:15 brewing ratio. This means using 15 grams of water for every single gram of coffee you weigh out. This golden ratio provides a beautifully balanced and rich extraction.
If you prefer a stronger, punchier morning cup, you can easily tighten the ratio to 1:12 or 1:13. Simply adjust your digital scale measurements until you find your personal ideal strength. Always measure by weight rather than volume for total consistency every single morning.
Do I need a special grinder for this recipe?
You do not need a massively expensive commercial grinder, but a decent burr grinder is highly recommended. Cheap blade grinders chop the beans violently, creating a messy mix of large boulders and fine dust. That extra dust will inevitably float directly into your final coffee mug.
A quality burr mechanism crushes the beans evenly, resulting in highly uniform coffee particles. Uniform grounds extract at the exact same rate in hot water, preventing sour or bitter flavor imbalances. This single equipment upgrade will instantly transform your entire home coffee experience.
Conclusion
Mastering this zero-plunge technique proves that you do not need expensive paper filters to enjoy a crystal clear coffee. By simply respecting the extraction time and managing the sediment carefully, you unlock the true sweet potential of your favorite beans.
The beauty of this method lies in its incredibly relaxing morning pace. Those nine minutes of waiting give you a quiet moment to prepare for the day while gravity does the heavy lifting for you. Try it tomorrow morning, and you will likely never plunge your coffee forcefully ever again.