Choosing between an AeroPress and a pour over comes down to how you prefer your morning routine. One offers a quick, heavy cup, while the other rewards patience with tea-like clarity. For those mornings where the ritual matters as much as the drink itself, the Workshop Pour-Over Set helps slow things down.
The gear that shapes your morning
Our top pick: The Workshop Pour-Over Set
For a manual brew that looks as good as it tastes, the Workshop Pour-Over Set is an excellent option. It combines a gravity dripper and a serving carafe into one unified piece of glass.
- Double-wall stainless steel filter: The conical metal mesh is integrated into the design. It lets natural coffee oils pass through into your cup, unlike paper filters that strip them away.
- Hand-blown borosilicate glass: The carafe features vertical striping that provides a secure grip when the glass is wet or oily.
- Turned solid wood collar: A wooden neck acts as a heat-resistant grip, so you can pour straight from the carafe.
- Faucet-style spout: The extended lip and downward angle create surface tension, pulling the last drop back into the spout rather than letting it run down the side.
- Thermal shock resistance: The glass handles extreme temperature shifts, from freezer cold to boiling water, without cracking.
The Toscana Pour-Over Set
If you prefer the clean, sediment-free profile that paper filters provide, we stock the Toscana Pour-Over Set. It features a V-shaped glass filter holder that fits standard size 02 cone filters, resting on a natural bamboo collar. The heat-resistant glass carafe includes measurement marks, letting you track your brewed volume as you pour. We stock it in 10 oz and 20 oz sizes.
The AeroPress Original
The classic plastic immersion brewer usually costs around $40. It is rugged and brews a concentrated cup in about two minutes. It requires proprietary paper discs and physical pressure to push the water through the grounds. It forgives sloppy pouring and uneven grinds better than most manual brewers.
Classic Ceramic Drippers
A standard ceramic V60 cone runs about $25. It is the baseline for gravity percolation, designed to sit directly on top of your favorite mug. It pairs best with a gooseneck kettle and uses standard paper cone filters.
What Is The Core Difference Between These Brewers?
The dividing line between these methods is the mechanics of extraction. Understanding this basic rule explains why these two simple devices produce such different tasting coffee.
The Science of Immersion
Immersion brewing means the coffee grounds soak in a chamber of water. The AeroPress uses this method, just like the classic pots in our French press collection. The water and coffee mingle freely until you actively force them apart.
- Consistent extraction: The coffee sits in the water, meaning the flavor pulls out evenly without much pouring technique required.
- Added pressure: Pushing the plunger down forces the liquid through a tight filter, extracting heavy oils and dense flavors.
- Quick brewing: Because of the added pressure, the entire process takes just under two minutes from start to finish.
The Science of Percolation
Percolation happens when fresh water flows constantly through a bed of coffee grounds. A pour over relies entirely on this gentle flow and gravity. You control the flavor by carefully managing how fast the water moves.
The constant addition of clean water pulls delicate, nuanced notes out of the bean. This is why pour over coffee tastes so clean. The water washes over the grounds, picks up the soluble compounds, and immediately drops into the carafe below.
Which Brewer Delivers Your Favorite Flavor Profile?
If you prefer heavy, chocolatey coffees with milk, you will likely prefer the AeroPress. If you enjoy drinking coffee black to taste bright, fruity notes, the pour over is your match.
The Bold Cup of Immersion
The AeroPress creates a concentrated base. It produces a heavy body that feels rich on your palate. The flavor is intense, heavy, and robust.
Because the extraction relies on pressure, it highlights sweet and earthy notes. This bold profile cuts through milk and sugar well. It rarely tastes weak, even if your water temperature is slightly off.
The Crystal Clear Brew
A well executed pour over highlights flavor clarity. You can taste the distinct individual notes of the coffee bean. It feels lighter in your mouth, resembling a rich black tea.
- High acidity: The steady water flow pulls out the bright, sparkling fruit notes that lighter roasts are famous for.
- Clean finish: The gravity drip through a fine mesh or paper filter traps the tiny coffee dust, leaving a smooth cup.
- Nuanced sweetness: Instead of heavy chocolate tones, expect delicate floral and honey-like sweetness to shine through.
What Equipment Do You Actually Need?
The pour over requires a few specific tools to control the water flow, while the AeroPress is famous for being low-maintenance. Both methods demand freshly ground coffee to taste their best.
The Most Important Tool: Your Grinder
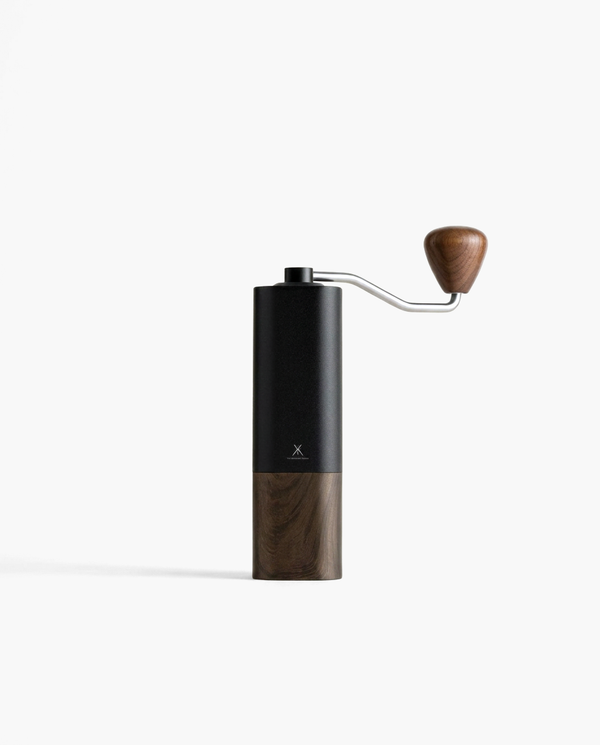
Pre-ground coffee loses its vibrant flavor within minutes. For both methods, a high-quality burr grinder from our coffee grinders collection is non-negotiable. A cheap blade grinder chops beans unevenly, leading to a cup that tastes both sour and bitter simultaneously.
A pour over needs a medium grind, similar to coarse sand. If the grind is too fine, the filter clogs and the brew stalls. The AeroPress performs better with a medium-fine grind, creating enough resistance for the plunger to do its job.
Mastering the Water Pour
You cannot make a great pour over with a standard wide-mouth kettle. You need absolute control over where the water lands. Pouring too fast creates channels in the coffee bed, leading to a weak, disappointing brew.
This is why a gooseneck kettle from our kettles collection is essential for gravity brewing. The elegant spout lets you pour with pinpoint accuracy, keeping the coffee bed evenly saturated.
Precision Measurement Tools
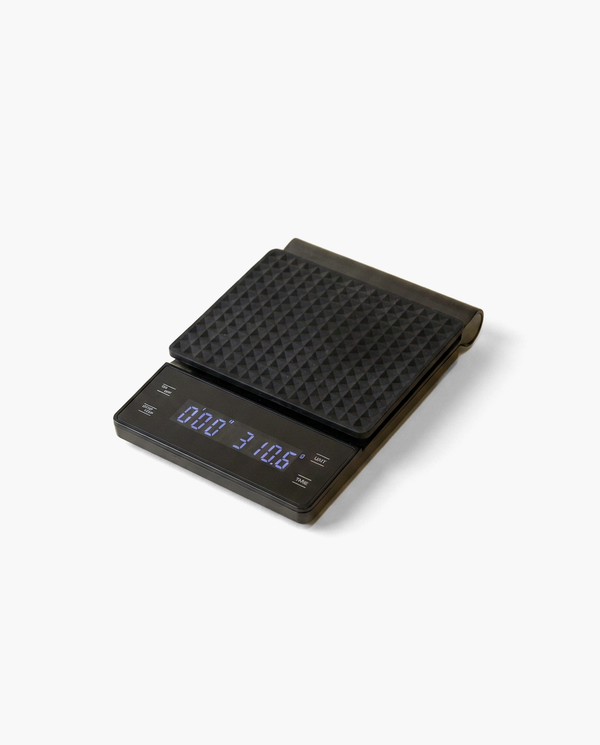
Guessing your coffee-to-water ratio is the fastest way to ruin a great bag of beans. Using a tablespoon yields different weights depending on the roast level. You need a dedicated digital scale to weigh your dose and track your pour in real time.
How Does The Pour Over Workflow Actually Feel?
Brewing a pour over is a hands-on experience that requires about three minutes of active attention. It is a peaceful morning ritual that rewards patience and precise technique.
Preparing the Brewer
If you use a paper filter, you begin by rinsing it thoroughly with hot water. This step heats the glass and washes away any residual paper dust. If you use the Workshop Pour-Over Set, you add your medium-ground coffee directly to the stainless steel mesh.
The Blooming Phase
You start the brew by pouring just enough water to wet the grounds. The coffee will immediately swell and bubble. This critical phase is called the bloom, and it allows trapped carbon dioxide to escape from the fresh roast.
- Pour gently: Aim for about double the weight of your coffee grounds in water.
- Wait patiently: Let the wet grounds rest undisturbed for forty-five seconds.
- Watch the bubbles: The escaping gas proves your coffee is fresh and ready to extract properly.
The Final Extraction
After the bloom, you begin pouring the rest of your water in slow, concentric circles. You must maintain a steady water level in the filter bed. This gentle agitation ensures every coffee particle gives up its flavor evenly.
The entire draining process takes about three minutes. If it drains too fast, your coffee will taste sour and thin. If it stalls, the metal mesh is clogged with fines, and your cup will taste bitter.
What Is The Daily AeroPress Routine Like?
The AeroPress is famous for being fast and practical. The entire brewing process takes less than two minutes and requires no special pouring technique.
The Standard Setup
You start by placing a small paper filter in the plastic cap and twisting it onto the brewing chamber. You stand the device on a sturdy mug. Then, you dump in your medium-fine ground coffee.
Unlike the delicate pour over, you do not need a specialized gooseneck kettle for this step. Any fast-boiling kettle works well. You just need hot water delivered quickly into the chamber.
Brewing and Pressing
Once the water is in, you give the slurry a quick stir to ensure all the dry pockets are saturated. You wait about one minute for the immersion to work. Then, you insert the rubber plunger.
You apply gentle, steady downward pressure for about thirty seconds. You will hear a distinct hissing sound when the water finishes passing through the grounds. Your dense, highly concentrated coffee is ready.
The Inverted Method
Many home brewers flip the device upside down to brew. This prevents any water from dripping through the filter before the pressing stage begins. It allows for longer, more controlled steeping times, much like a traditional pot from our coffee makers collection.
Which Method Wins For Morning Convenience?
When the alarm goes off at six in the morning, convenience matters. Comparing the cleaning process and the margin of error reveals which brewer fits your lifestyle.
Forgiveness and Consistency
The AeroPress is forgiving. If your water is slightly too cool, or your grind is slightly uneven, you still get a drinkable cup. It is a common device for sleepy mornings.
The pour over demands attention. A slipped pour or an incorrect grind size will result in a bitter or sour cup. It requires a dedicated focus that some people find relaxing, while others find it tedious.
The Cleanup Comparison
Cleaning an AeroPress is straightforward. You unscrew the cap and push the plunger to pop out a solid puck of dry coffee grounds straight into the trash. A quick rinse under the tap finishes the job.
Cleaning a pour over is slightly more involved. You rinse the stainless steel filter immediately after brewing. Once a week, you soak the metal mesh in warm water with a pinch of baking soda to dissolve trapped oils. The glass carafe requires a simple hand wash with mild dish soap.
Mistakes that ruin the cup
- Skipping the scale: Guessing your water volume leads to wild swings in strength. A digital scale keeps your ratio exact.
- Using boiling water: Water right off the boil extracts harsh compounds. Let the kettle sit for thirty seconds off the heat before you start pouring.
- Pouring too fast: Flooding a pour over bed causes the water to bypass the coffee entirely. You want a slow, steady stream that keeps the grounds gently agitated.
- Ignoring the bloom: Fresh coffee holds carbon dioxide. If you do not let the grounds wet and rest for forty five seconds, the trapped gas prevents the water from reaching the flavor.
Sunday, half past seven, and the dog asleep on the rug
The house is quiet, the morning light just hitting the kitchen counter. You measure out the beans, the grinder runs for a few seconds, and the smell of fresh coffee fills the room. You pour the first circle of water over the grounds and watch the bloom rise, the dark crust swelling against the stainless steel mesh.
The water drips steadily into the striped glass carafe, marking time while the rest of the world stays asleep. You lift the wood collar, pour the first cup, and the flavor is bright and clear.
If you take one thing from this article: an immersion press is built for speed, but a crafted pour over turns a morning chore into a ritual worth waking up for.
Frequently Asked Questions
Which brewing method is better for absolute beginners?
The AeroPress is generally easier for a beginner to master right out of the box. Its total immersion style means the water and coffee interact well even if your pouring technique is sloppy. You do not need a specialized gooseneck kettle to make it work.
Conversely, a pour over requires a bit more practice and specific tools to avoid sour or bitter flavors. However, learning the pour over technique is rewarding and teaches you the fundamentals of excellent coffee extraction.
Can I use the exact same coffee beans for both methods?
You can use the same coffee beans, but they will taste different depending on the brewer you choose. An immersion brew will highlight the heavy, chocolatey, and earthy notes naturally present in the roast.
The exact same bag of beans brewed in a glass dripper will taste noticeably brighter, thinner, and more acidic. We recommend trying a high-quality light roast in both devices to experience how much the brewing mechanics change the final profile.
Do I really need a gooseneck kettle for manual brewing?
If you are brewing with a gravity-based dripper, a gooseneck kettle is a necessity for success. Without precise control over the water stream, you will accidentally agitate the coffee bed unevenly, leading to an unbalanced and disappointing cup.
If you are using an immersion device like a French press or a plastic press, a standard kettle works fine. You only need to deliver hot water into the chamber quickly, making the spout shape irrelevant to the final flavor.
How does the daily cleanup compare on a busy morning?
The plastic press is famous for its instant cleanup process. You remove the filter cap, push the solid puck of dry grounds directly into your compost bin, and give the rubber seal a quick rinse. The entire process takes roughly ten seconds.
A glass dripper requires a slightly more careful approach. You must rinse the filter, discard the grounds, and hand-wash the glass carafe to prevent coffee oils from building up. It takes about one minute of your time.
Why does my pour over taste unpleasantly bitter?
A bitter cup usually means you have over-extracted the coffee, pulling out harsh compounds that should have stayed inside the bean. The most common culprit is using a grind size that is too fine. This causes the water to drain slowly, extending the brew time.
To fix this immediately, adjust your burr grinder to a noticeably coarser setting tomorrow morning. Additionally, ensure your water is not boiling vigorously when it hits the grounds. Dropping the water temperature slightly can dramatically reduce bitter flavors in your daily cup.