There is a specific moment of disappointment that every coffee lover faces. You’ve bought the fresh beans, you’ve watched the videos, but the shot you just pulled tastes nothing like the rich, velvety espresso from your local café. It’s either aggressively sour or hollow and bitter. You are not alone in this frustration. In fact, over 24,000 home baristas have turned to us to solve this exact dilemma.
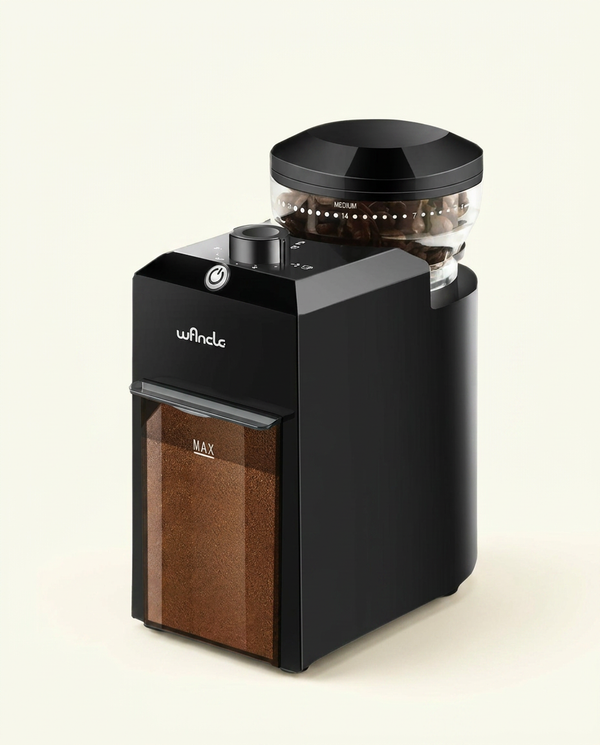
The truth is, building the best beginner espresso setup isn't about buying the most expensive machine with the most chrome plating. It is about precision, consistency, and understanding the variables of extraction. Many beginners blow their budget on the machine and neglect the most critical component: the grind. If you want to transform your morning ritual immediately, the first step is to upgrade to a Precision Manual Grinder. Without uniform particle size, even a $5,000 machine will produce a bad cup. Let’s dive into how you can build a professional-grade station right in your kitchen.
**

**
****
History: The Evolution of the Home Espresso Setup
To understand what makes a beginner espresso setup effective today, we have to look at where we started. The quest for "espresso", literally "pressed out" coffee, began in the late 19th century in Italy. Inventors like Angelo Moriondo and Luigi Bezzera sought to reduce brewing time to accommodate busy workers. However, these early machines relied on steam pressure, which often scorched the beans and resulted in a bitter, burnt flavor profile.
It wasn't until the mid-20th century that the lever-driven machine introduced the high-pressure extraction (9 bars) that defines modern espresso. This pressure emulsified the coffee oils, creating the "crema" that is now the hallmark of a good shot. For decades, this technology was massive, expensive, and exclusively commercial.
For a deep dive, read our complete espresso machine guide.
In the 1970s and 80s, the market saw the introduction of the home espresso setup. Suddenly, the ability to create pressure was miniaturized. However, early home machines were often underpowered or relied on "steam toys" that mimicked the bitter failures of the 19th century. Today, the landscape has shifted. We now have access to affordable pumps and manual brewing devices that can replicate commercial pressure. Understanding this history helps us appreciate that the gear we choose for the best home espresso setup must prioritize pressure stability and thermal consistency over gimmicks.
🎯 THE GOLDEN RATIO TABLE
| Portafilter Basket Size | Coffee (Grams) | Water (ml) | Brew Time | Output (approx) |
|---|---|---|---|---|
| Single Basket | 7g, 9g | 25ml, 30ml | 20-25 secs | 14ml, 18ml |
| Double Basket | 18g, 20g | 60ml | 25-30 secs | 36ml, 40ml |
| Triple Basket | 21g, 22g | 75ml | 30-35 secs | 45ml, 50ml |
| Moka Pot (3 Cup) | 15g, 17g | 150ml | 3-4 mins | 120ml |
The Science: Why Electric Grinders Fail You
If you are struggling with your current brewing method, the culprit is almost certainly "channeling." This is a phenomenon where water, under pressure, finds the path of least resistance through your coffee puck. Instead of flowing evenly through all the coffee, the water drills a hole through one weak spot. This results in a cup that is simultaneously sour (under-extracted in some parts) and bitter (over-extracted in the channel).
Why does this happen? Usually, it is because of inconsistent grind size. Most entry-level electric grinders (especially blade grinders) produce "boulders" (large chunks) and "fines" (dust-like particles) in the same batch. The fines clog the filter, while the boulders let water rush past without extracting flavor. According to research from Sprudge, particle uniformity is the single biggest factor in flavor clarity.
When you use high-speed electric grinders, you also introduce heat. The friction from high-RPM blades warms the coffee beans before they even hit the water, causing volatile aromatics to evaporate. You are essentially losing the floral and fruit notes of your coffee into the air, rather than the cup.
**

**
****
The Smart Solution: Why French Press & Co is Different
When curating the best beginner espresso setup, durability and thermal properties are paramount. Many starter kits rely on cheap plastics that degrade over time and fail to retain heat. French Press & Co takes a different approach. Our equipment is engineered with 304-grade stainless steel and high-density ceramic.
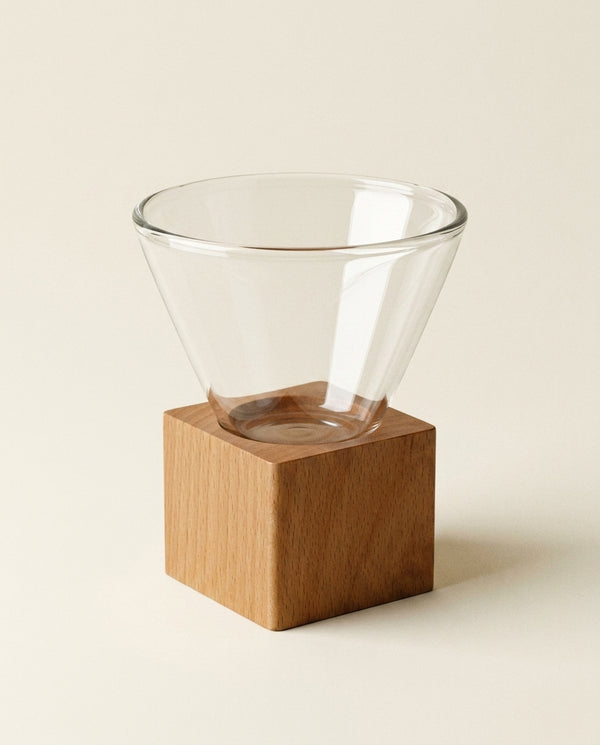
Ceramic burrs are harder than steel and do not rust, ensuring that your grind remains sharp for years. Furthermore, our focus on thermal insulation means your coffee stays at the optimal serving temperature. A common pro trick is to brew your espresso and then decant it if you aren't drinking it immediately. You can Use our Stainless French Press as a serving carafe to keep your best beginner espresso setup hot without burning it. This modular approach allows you to build a setup that lasts a lifetime, rather than one you'll throw away in a year.
Comparison Table
| Feature | Amateur Method (Blade/Pod) | French Press & Co Method |
|---|---|---|
| Grind Consistency | Random chunks & dust | Uniform, precise particle size |
| Heat Transfer | High friction burns beans | Cool grinding preserves aromatics |
| Material | Plastic & weak alloy | 304 Stainless Steel & Ceramic |
| Control | Single button push | Full variable adjustment |
Step-by-Step Guide: The Perfect Brew
Creating the perfect shot is a ritual. It requires patience and the right process. Follow these steps to maximize your beginner espresso setup.
Step 1: The Precision Grind
We cannot stress this enough: your brew starts here. Set your grinder to a fine setting (similar to table salt). You want to achieve consistent results with a Precision Manual Grinder. Weigh your beans, 18 grams is the standard for a double shot. Grind steadily. The manual action prevents heat buildup, preserving the volatile oils.
Step 2: Prep and Tamp
Place the grounds into your portafilter basket. Use your finger to level the bed of coffee so it is flat. Then, use a tamper to apply even pressure (approx. 30 lbs). The goal is to create a compact, level puck that resists the water pressure evenly. If the bed is slanted, the water will channel to one side.
Step 3: The Extraction
Lock the portafilter into the machine (or screw on the top if using a Moka Pot). Start the water flow. You are looking for a flow that resembles warm honey. If it gushes out like a faucet, your grind was too coarse. If it drips slowly or not at all, your grind was too fine. Aim for 25-30 seconds of brew time.
Step 4: Texturing the Milk
If you are making a latte or cappuccino, the milk texture is as important as the coffee. You don't need a giant steam boiler to get results. Heat your milk to 140°F (60°C) and then create microfoam with the Milk Frother. Pump the frother vigorously for 20 seconds, then swirl the pitcher to incorporate the bubbles until the milk looks like wet paint.
📊 Troubleshooting Table
| Problem | Cause | Fix |
|---|---|---|
| Sour / Acidic Taste | Under-extraction (water moved too fast) | Grind finer or increase water temperature. |
| Bitter / Dry Taste | Over-extraction (water moved too slow) | Grind coarser or lower water temperature. |
| Watery Shot | Dose too low or beans too old | Increase coffee dose (up to 20g) or buy fresh beans. |
| No Crema | Stale beans | Use beans roasted within the last 30 days. |
Maintenance
A great home espresso setup is only as good as its cleanliness. Coffee oils are rancid; if you leave old residue in your portafilter, basket, or grinder, it will taint every subsequent cup with a funky, stale flavor.
After every session, knock out the puck immediately and rinse the basket. Once a week, you should perform a deeper clean. For your grinder, disassemble the burrs (consult the manual) and brush out the fines. Do not use water on steel burrs, but ceramic burrs can often be rinsed (check your specific model). If you are using a machine with a water tank, you must descale it every 2-3 months depending on your water hardness. Limescale buildup is the number one killer of espresso machines. Taking ten minutes a week to maintain your gear ensures your investment pays off in delicious coffee for years.
**

**
****
Conclusion
Building the best beginner espresso setup doesn't have to be intimidating or break the bank. It starts with respecting the bean and equipping yourself with tools that offer consistency and control. By prioritizing a high-quality manual grinder and mastering the fundamentals of ratio and timing, you can outperform most high-street chain cafés from the comfort of your kitchen.
Join 24,000+ coffee lovers who have already upgraded their morning ritual. The journey to the perfect cup is rewarding, and it tastes better when you’ve crafted it yourself. For more insights, check out our guide on best affordable cappuccino machine.
Frequently Asked Questions
1. How fine should I grind for espresso?
You should aim for a texture similar to fine table salt. It needs to be fine enough to create resistance against the water pressure but not so fine that it clogs the machine. Experts suggest making small adjustments until the shot pours like warm honey.
2. Do I need a scale for my espresso setup?
Absolutely. Guessing your dose leads to inconsistent flavor. A simple digital kitchen scale allows you to measure exactly 18g of coffee, ensuring that your extraction variables remain constant every single morning.
3. How fresh should my coffee beans be?
Ideally, you should use beans that were roasted between 7 and 30 days ago. According to the experts at Sciencedirect, beans lose significant chemical compounds after this window, leading to a loss of crema and "flat" tasting shots.
4. Can I make espresso without a machine?
Technically, "true" espresso requires 9 bars of pressure, which is hard to achieve without a machine or a specialized manual lever device. However, a Moka Pot creates a strong, rich coffee concentrate that is the closest stovetop alternative to espresso.
5. How do I clean my manual grinder?
Disassemble the grinder carefully. Use a small brush to sweep away old grounds and oil from the burrs. Avoid washing ceramic or steel burrs with water frequently, as moisture can get trapped; a dry brush is usually sufficient for regular maintenance.